


Beginner’s Guide to Eyebrow Threading and Tinting for Beautiful Brows
Learning how to thread and tint eyebrows can feel exciting and intimidating at the same time. Threading looks simple until the thread starts slipping, and tinting seems easy until the color processes darker than expected.
If you're a beginner who wants to learn eyebrow threading and tinting—whether you're exploring a new beauty skill or hoping to eventually add brow services to your business—the key is learning the fundamentals before worrying about speed or perfect results.
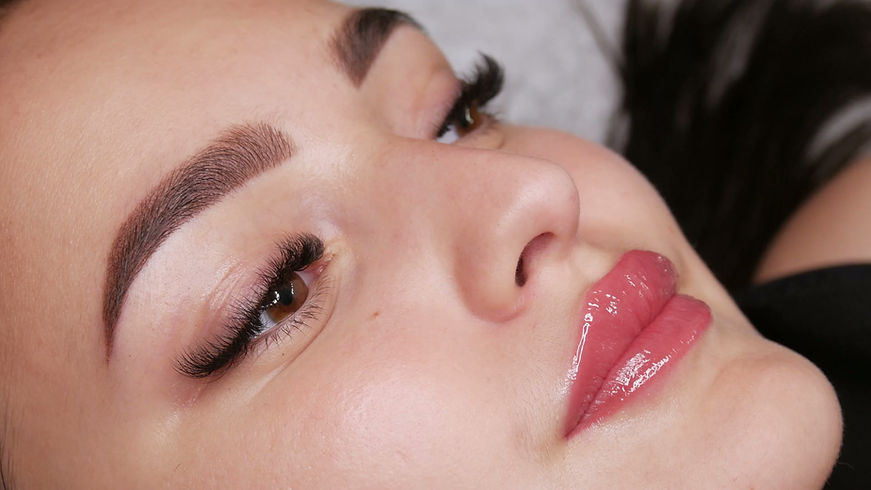
Eyebrow threading and tinting work beautifully together because they do two different things. Threading shapes and cleans the brow by removing unwanted hair, while tinting enhances the brow hairs to create more visible definition and fullness. Together, they can create a cleaner, fuller, more polished brow while still working with the client's natural brow.
In this beginner's guide, we'll cover how eyebrow threading works, what tinting does, what you should learn first, common mistakes to avoid, and how to start practicing your skills safely.

What eyebrow threading is and how it works
Eyebrow threading is a hair removal method that uses twisted cotton thread to lift hair from the follicle. The thread is doubled and twisted, then controlled with hand movements so the twisted section catches and removes hair in clean lines.
Unlike tweezing, which removes one hair at a time, threading can remove short rows of hair. This makes it useful for shaping the brow outline, cleaning the middle area between the brows, and removing fine facial hair around the brow area.
Threading does not cut the hair. It pulls the hair out from the root, which is why results usually look crisp when done correctly. For beginners, the real skill is not just moving the thread. It is learning how to control pressure, direction, tension, and placement.
The basic threading concept
The thread forms a loop with twists in the center. When you open and close your fingers, the twisted section moves from side to side. That moving twist traps hair and pulls it out.
The key parts of an eyebrow threading technique include:
Keeping the thread tight enough to grip hair
Moving the twist in the correct direction
Holding the skin taut
Working in small, controlled sections
Avoiding the actual brow body until you understand the shape
A beginner should not rush into shaping brows right away. Start by practicing the thread movement away from the face, then practice on safe areas with visible hair before attempting brow shaping.
Why skin support matters
Threading works best when the skin is stretched gently. Loose skin can get caught in the thread, which may cause pinching or irritation. Around the brow, skin support also helps create cleaner lines.
When practicing, learn where the supporting hand goes and how to keep the skin firm without pulling harshly. This is especially important near the eyelid, where the skin is thinner and more delicate.
What eyebrow tinting is and what it does
Eyebrow tinting is the process of applying semi-permanent color to brow hairs. The goal is not to color the skin like makeup. The goal is to make brow hairs look darker, fuller, and more defined.
Tinting can help brows look more even when the hair is naturally light, sun-faded, gray, sparse, or hard to see. It can also reveal fine brow hairs that become part of the shape once they are colored.
For anyone trying to learn eyebrow tinting, the most important thing to understand is that color choice and timing matter. Brow tint can look soft and natural, or it can look too dark if the shade is too deep or left on too long.
What tint can and cannot do
Tinting can:
Darken light brow hairs
Make the brow shape look fuller
Add definition without daily makeup
Help fine hairs show within the brow outline
Tinting cannot:
Create hair where no hair exists
Permanently change brow shape
Replace careful brow mapping
Fix over-threading or poor shaping
Think of tint as a way to enhance the brow hairs that are already there. It works best when paired with a thoughtful shape.

Why threading and tinting work well together
Brow threading and tinting complement each other because they address separate parts of the brow service.
Threading removes the hairs that do not belong in the chosen shape. Tinting makes the hairs inside the shape more visible. When done in the right order and with careful planning, the result can look clean but still natural.
A common beginner mistake is treating them as two separate tasks with no connection. In reality, the tint can change how the brow shape appears. Light hairs that were almost invisible may become part of the brow once tinted. That means brow mapping should happen before either service.
Understanding the order of a threading and tinting service
Threading and tinting shouldn't be treated as two unrelated steps. Before beginning either service, you should evaluate the natural brow, understand the shape you're trying to create, and have a plan for the finished result.
The exact order of threading and tinting can depend on the products being used, the technique being taught, and the needs of the client. What's most important for a beginner is understanding why each step is being performed and how it affects the final brow shape.
Always follow the instructions for the specific tinting products you're using and the procedure taught in your training.
A beginner-friendly flow looks like this:
Clean the brow area.
Study the natural growth pattern.
Map the brow shape.
Apply tint carefully within the planned area.
Remove tint at the correct time.
Thread outside the finished brow shape.
Tweeze any tiny hairs if needed.
Brush and check symmetry.
The exact order can vary by training, product directions, and personal method. What matters is that the shape guides the whole service.
What beginners need to learn before threading brows
Before trying to thread someone’s eyebrows, build a foundation. Threading is a hands-on skill, and the small movements matter.
Thread control and hand movement
Thread control is the first big challenge. Beginners often focus on the thread touching the skin, but the real control comes from the hands.
Practice these basics before working near brows:
Opening and closing the fingers smoothly
Moving the twist in both directions
Keeping steady tension in the loop
Controlling speed instead of snapping quickly
Practicing on flat areas before curved areas
You can practice with thread around your fingers while watching the twist move. Then practice removing hair from a less delicate area, such as the forearm, if your skin tolerates it. Avoid irritated, broken, sunburned, or recently treated skin.
Why brow shape matters
Threading without understanding brow shape can lead to over-removal. A brow may look fine up close but uneven when viewed with the full face.
Brow shaping usually considers three main points:
Where the brow begins
Where the arch sits
Where the tail ends
These points should work with the person’s bone structure, natural hair growth, and existing brow thickness. A soft, balanced brow often looks better than a shape that is too thin or too sharply angled.
Beginners should also learn that brows are sisters, not identical copies. The goal is balance, not forcing both sides into the exact same line.
Common threading mistakes beginners make
Most early threading mistakes come from rushing or removing too much hair too soon.
Common mistakes include:
Using loose thread that does not grip hair well
Moving the twist in the wrong direction
Forgetting to hold the skin taut
Working too close to the brow line too early
Taking large sections instead of small sections
Removing hair from the top of the brow without a clear plan
Chasing perfect symmetry until the brows become too thin
The safest beginner habit is to remove less than you think you need to. You can always clean up more, but you cannot immediately replace brow hair once it is gone.

What beginners should understand about brow tinting
Tinting looks simple, but small choices can change the result. The shade, placement, timing, and skin protection all affect how the brows look afterward.
Always follow the instructions for the specific tint product being used. Products can vary, and brow tint should be used only as directed. Keep tint away from the eyes, and do not tint over irritated or broken skin.
Tint selection
A natural-looking brow tint usually works best when it complements the hair color and skin tone. Going too dark is one of the fastest ways to make brows look harsh.
As a general learning principle:
Light blond brows often need a soft blonde or light brown tone.
Medium brown brows may need a neutral or medium brown.
Very dark brows may need subtle depth rather than a dramatic color change.
Gray or resistant brow hairs may require extra care and product guidance.
When in doubt, start softer. A beginner should avoid dramatic color changes until they understand processing time and color behavior.
Application and processing time
Clean application matters. Tint should be placed where color is wanted, not smeared far outside the brow shape. A barrier product around the brow can help reduce skin staining, but it should not coat the brow hairs that need to absorb color.
Use a small angled brush or tint brush for control. Apply evenly from one brow to the other, then watch the time carefully. Processing time should follow the product directions, not guesswork.
Beginners sometimes leave tint on longer because they think it is not working. Tint can develop quickly, and brows often look darker when wet. Remove and check rather than waiting too long.
Safety basics for eyebrow tinting
Safety should come before results. Brow tint is used near the eyes, so careful handling matters.
Good habits include:
Read product instructions before mixing.
Perform allergy testing as directed by the product.
Use products made for brows, not hair dye meant for the scalp.
Keep tint out of the eyes.
Do not tint skin that is cut, inflamed, sunburned, or freshly treated.
Use clean tools and avoid cross-contamination.
Remove product right away if strong discomfort occurs.
If tint enters the eye or causes a concerning reaction, rinse according to product guidance and seek appropriate medical advice.
Common tinting mistakes
Beginners often struggle with tint because the result is visible right away.
Common mistakes include:
Choosing a shade that is too dark
Applying tint outside the mapped shape
Leaving the tint on too long
Forgetting to set a timer
Using too much product
Ignoring product instructions
Tinting before checking for sensitivity concerns
Expecting tint to fill bare gaps like pencil or pomade
A good eyebrow tinting technique is controlled, neat, and patient. The best results often look enhanced rather than obvious.
How to practice and improve
Practice is where brow skills develop. Watching tutorials can help, but threading and tinting require hand skill, judgment, and repetition.
Can you teach yourself threading and tinting?
You can begin learning the fundamentals of threading and tinting on your own, especially if you're patient, careful, and willing to practice.
Many beginners start by learning thread movement at home, studying brow shapes, and practicing their control before working on real brows.
If you prefer having the fundamentals organized in one place instead of trying to piece everything together from different videos and tutorials, my Eyebrow Threading & Tinting Training Manual gives you a self-paced resource you can refer back to while you're learning and practicing.
Self-teaching still has its limits. It can be difficult to recognize your own mistakes, especially when it comes to angles, tension, symmetry, and technique. If you plan to offer services professionally, also check the licensing, training, and permit requirements where you live, as requirements vary by location.
A smart learning path looks like this:
Study brow anatomy and common brow shapes.
Practice thread movement daily in short sessions.
Learn mapping before removing brow hair.
Practice tint placement without product first.
Use timers every time you practice tinting.
Take clear before-and-after photos to review your work.
Ask for feedback from someone experienced when possible.
How to build confidence without overdoing it
Start with low-risk practice. Do not begin by reshaping a full brow. Learn cleanup first. Removing stray hairs around an existing shape is easier than creating a new shape from scratch.
For tinting, practice brush control before mixing color. You can use a clear gel or practice cream on a brow map to learn neat placement. This helps train your hand without the pressure of permanent-looking results.
Keep notes as you practice. Write down what thread length felt comfortable, what hand position worked, which tint shade you used, and how long it processed. These notes help you improve faster because you are not guessing each time.

What to consider before offering brow services professionally
If your goal is to offer eyebrow threading and tinting as a paid service, treat the skills seriously from the beginning. Good brow work involves more than creating a pretty before-and-after photo.
You will need to think about:
State and local rules for beauty services
Sanitation and infection control
Client consultation forms
Allergy and sensitivity screening
Product storage and labeling
Clear aftercare instructions
Professional boundaries and honest expectations
Insurance or business requirements, if applicable
Client communication matters too. Before touching the brows, ask about skin sensitivity, recent facial treatments, medications that may affect the skin, previous reactions, and the desired brow look. If something seems unsafe, do not perform the service.
A complete brow service should feel calm and careful. Map first, explain the plan, check comfort, work in small sections, and review the finished result before making extra changes.
If you're ready to start learning but want more structure than random online tutorials can provide, my Eyebrow Threading & Tinting Training Manual was created to help you learn at your own pace. You'll have a resource you can study, practice from, and refer back to as you build your threading and tinting skills.
The key to beautiful brows is careful learning
Eyebrow threading and tinting are valuable skills because they combine shape and definition. Threading creates clean lines, while tinting brings out the brow hairs that can make the shape appear fuller and more defined. When the two techniques are used together, they can create polished brows without taking away from the natural look.
Start slowly. Learn thread control before worrying about speed. Understand brow mapping before removing hair, and learn how tint selection, application, and processing time can affect the finished result. Most importantly, give yourself time to practice. Beautiful brow work comes from patience, proper technique, and consistency.
If you're ready to start building those skills and would like step-by-step guidance you can follow at your own pace, my Eyebrow Threading & Tinting Training Manual can help you get started. Use it alongside your practice as you become more comfortable with both techniques.


Comments